
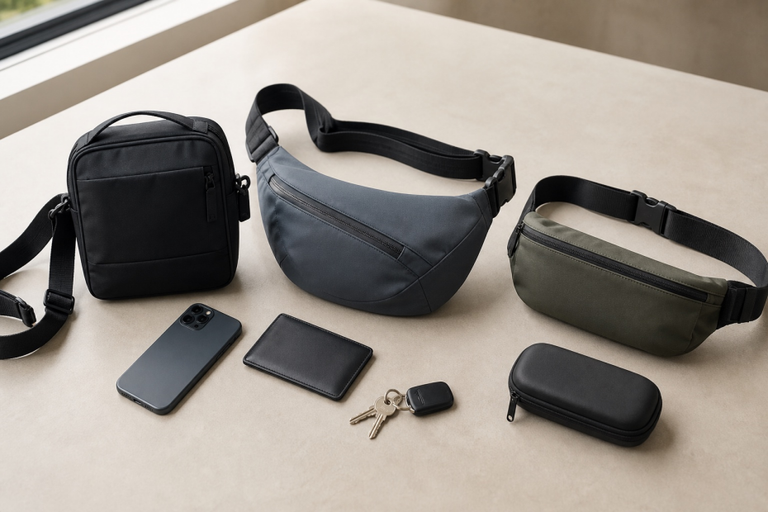
A 20 cm belt bag appeared wide enough for a cased 6.7-inch phone. The body dimension was misleading. Its zipper ended inside both side seams, leaving only 15.5 cm of clear opening, and the phone caught at the zipper end during removal. Worn across the chest, the loaded sample also tipped forward instead of staying against the wearer.
This crossbody bag size guide starts with the items the bag must hold, then follows the opening, strap range, anchor position and pocket layout through sample review. Those details need to work together while the bag is loaded and worn.
Start With the Items, Not a Small or Medium Label
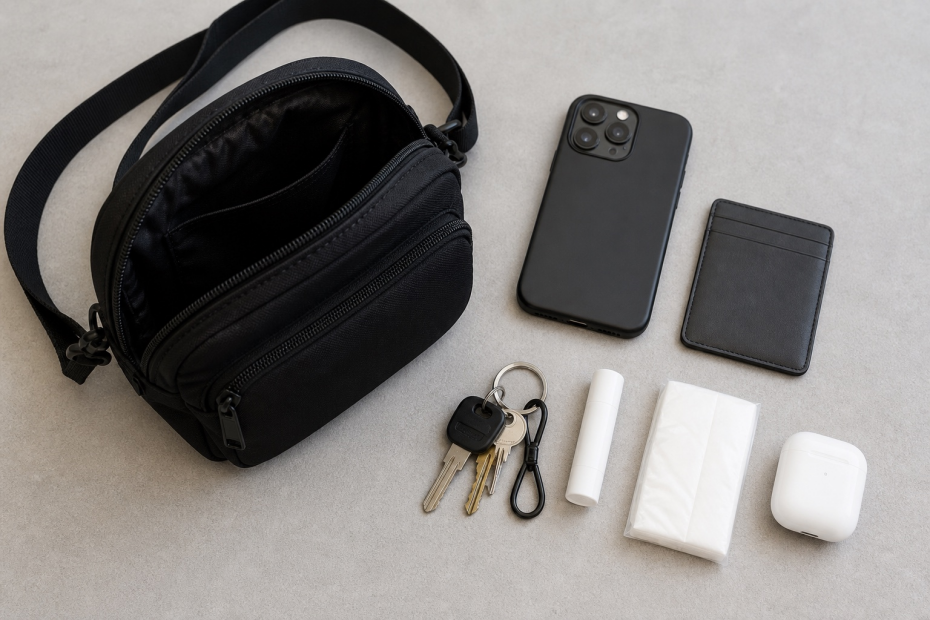
The first sample needs an item list. Include everything the bag has to carry at the same time, then mark the pieces that control the pattern. For a compact crossbody, that may be a cased phone and a thick earbud case. A sling bag may instead be governed by a folded umbrella, a soft bottle or a hard glasses case.
| Product direction | Reference outside size / capacity | Items that control the first pattern | Wearing position | Main sizing risk |
| Small box-shaped crossbody | 14 × 19 × 6 cm; approximately 1.5 L | Cased phone about 16.5 cm long; earbud or key case about 2.5–3 cm thick | Side torso or hip, with brief top-handle carry | Enough access and internal thickness within a compact body |
| 4L multi-pocket sling | 30 × 16 × 9 cm; nominal 4 L | Bottle or folded umbrella about 21 cm long; hard glasses case | Back or chest after the bag is rotated forward | Curved access, usable depth and space taken by pocket layers |
| Convertible belt bag | 21 × 13 × 5.5 cm; approximately 1.5 L | Cased phone about 16.5 cm long | Waist or hip and upper-torso crossbody | A shallow body that still provides usable access in both wearing modes |
These measurements describe the three reference products. They are not universal size recommendations for every crossbody, sling or belt bag.
Each row leads to a different pattern decision. The compact crossbody needs enough internal height and depth for the phone and the thicker small items to sit together. The 4L sling needs a body shape that accepts the 21 cm item while leaving useful room after its pocket layers are sewn in. The belt bag has less freedom in depth because it is expected to stay close to the body in two positions.
Capacity is still useful for comparing products, but a liter figure does not show the opening shape or the space occupied by lining, seams and compartments. Before the first pattern is confirmed, provide the dimensions or physical samples of the longest, thickest and least flexible items, together with the complete pack-out. The pattern can then be built around the contents the bag is expected to carry.
Measure the Clear Opening Separately From the Bag Body
A cased phone measuring about 16.5 cm cannot pass cleanly through a 15.5 cm opening. That was the mismatch on one belt-bag sample, even though the body had been described as 20 cm wide.
Once the phone was inside, the main compartment had room for it. The difficulty came at the top edge. Both ends of the straight zipper ran into the side seams, and the case caught against the teeth during insertion and removal. For this sample, the useful figure was the clear opening after sewing.
The specification also needed a separate figure for the zipper itself. Zipper-path length is measured along the teeth and follows any curve in the opening. On the Small Crossbody reference, the 16.5 cm figure belongs to this curved zipper path. Its straight aperture needs another measurement before it can be compared with the phone.
For the belt bag, the zipper was changed to a shallow curve and continued about 2 cm into each side gusset. The revised sample had a reported clear opening of approximately 19 cm. These are project-specific measurements. Extending the usable zipper route gave the phone more room to pass without making the whole body much larger.
The measurement needs to be taken after the bag is sewn, with its lining, piping and zipper stops in place. Use the same case, cap or other attachment that will be on the item in normal use. Check the bag again while it is held or worn in the intended position. If the item passes only after the body is twisted or one end of the zipper is pulled hard, the opening still needs attention even though there is enough room inside.
Set the Strap Range for the Wearing Modes You Will Actually Sell
At the waist, the first belt-bag sample could be tightened to about 68 cm. Over a winter coat, crossbody wear called for more than 130 cm. At that setting the webbing was long enough, yet the side-release buckle climbed toward the collarbone. The revised sample shared the adjustment between both sides. Its recorded range was 65–140 cm. With an adjuster on each side, the buckle could sit away from the collarbone in crossbody wear and away from the hip bone at the waist. Those figures belong to this project.
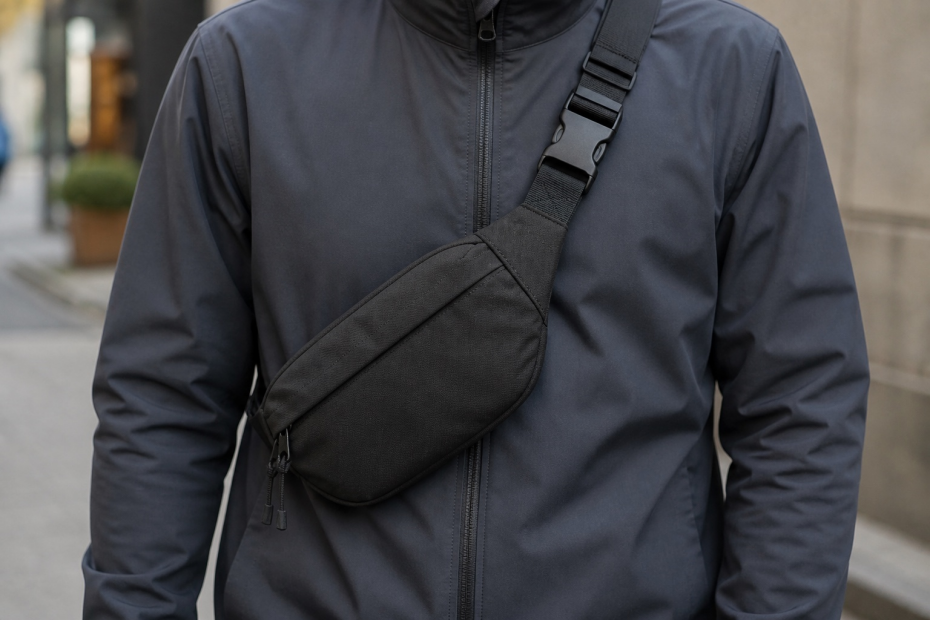
We would not approve a strap from total length alone. The cut webbing loses length at the folded ends, adjuster, buckle and sewn connections, so the finished usable range has to be checked on the body. On the compact Small Crossbody, 2.5 cm webbing covers a reference range of 75–140 cm. The 4L Sling uses 3.8 cm webbing over 80–135 cm and has a movable shoulder pad. Our Belt Bag sample also uses 3.8 cm webbing, but its waist-and-crossbody fit needed the two-sided arrangement. Similar numbers do not mean the bags fit or carry the same way. Bag height changes where the load sits, and strap width still has to suit the hardware, expected sample load and requested hand feel.
A range is incomplete unless the measurement points are named. One specification may measure the finished strap between its bag connections. Another may record the complete worn loop, including the bag body. Strap drop is a third measurement. Put the selected method and its start and end points on the specification, then use the same method on the sewn sample.
Put the sample on at the shortest and longest settings. Do this in every approved wearing mode, using the lighter clothing and winter outerwear expected for the product. Record strap drop from the agreed points, then look at the bag, buckle and slider. The hardware should remain reachable and should not settle on the neck, collarbone or hip bone. If it does, the stated range is not ready for approval.
Anchor Position Decides Whether the Loaded Bag Sits Flat
An empty belt bag may look balanced on a table and tip forward as soon as it is worn. On the first anonymous sample, the strap connections sat high on the rear of the bag. Add the phone and keys, and the top edge pulled away from the chest.
Extra strap length would not change that pull direction. The correction used soft tapered wings about 3.5 cm wide, with the webbing leaving the bag at an upward angle of about 15 degrees. On this sample, that moved the line of pull through a lower part of the bag and gave the strap a broader connection at each side. The figures describe this project, not a standard wing pattern for every belt bag.
Where the contents sit matters as well. A phone held close to the back panel does not load the bag in the same way as a hard item pushed into a front pocket. A pocket layout that moves weight outward can make the top edge more likely to roll away from the wearer, even when the strap length is correct.
Check the anchor layout with the intended items packed and the bag worn in every approved mode. Watch the top edge, the way each wing bends and whether the rings or buckle make the strap twist. During the later movement check, the revised project sample stayed close to the body without the earlier forward rotation. That result belongs to the tested sample and load.
Add Compartments Only When They Improve Access
Three compartments can be enough in a compact crossbody. Five can make sense in a 4L sling. The useful number depends on what needs to be separated and how the wearer reaches it.
The Small Crossbody keeps the layout simple: a main compartment, a dimensional front zip pocket and an internal slip pocket. That gives the phone room inside while small quick-access items have somewhere else to go. On the larger sling, separate front and rear pockets are easier to justify. The bag is rotated from the back to the chest, so the wearer can reach a front compartment without opening the main load area. Inside, a mesh zip pocket and a slip divider keep smaller items from moving around the bottle, umbrella or glasses case.
That five-part layout would take too much from a shallow belt bag. The Belt Bag keeps three main storage zones: the main compartment, a two-section elastic-mesh organizer inside it and a flat rear zip pocket close to the body. The mesh sections hold small items without adding another stiff zipped layer across the main space.
Each extra panel still has a cost. Lining, zipper tape, elastic edges and overlapping seams all occupy room, and a hard item can be pushed toward the body or zipper when several pockets meet at the same point. Before adding a compartment, name the item that belongs there and the access action it improves. If neither is clear, the space may be more useful in the main compartment.
A rear pocket can make access less exposed because it sits against the wearer. Its position alone does not make the bag theft-proof.
Check the Sample Loaded, Worn and in Motion
A crossbody sample is ready for approval only when its separate decisions still work together. Use the finished sample, the confirmed contents and the people or fit references named for the project.
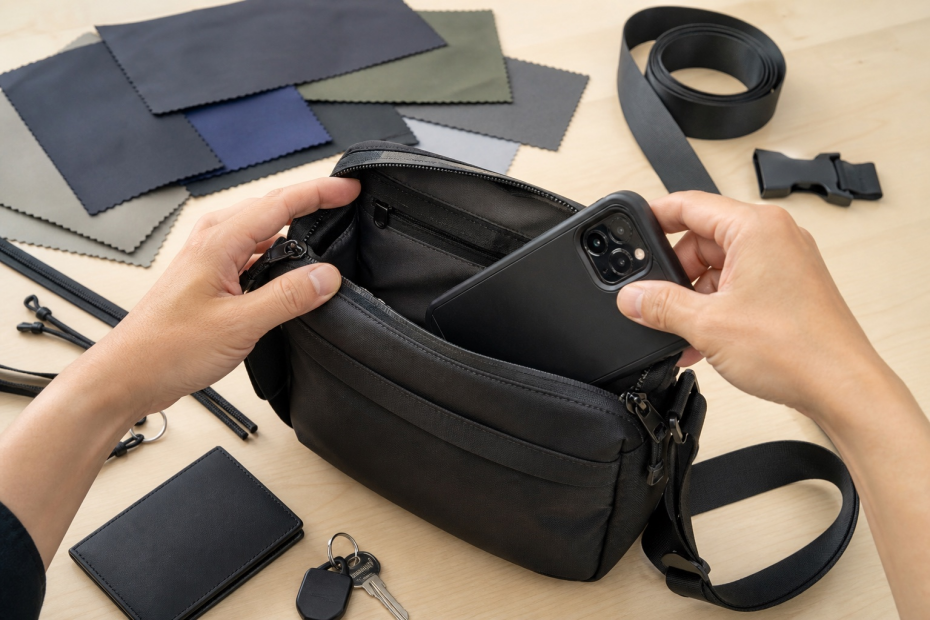
- Pack the complete item set. Keep cases, caps and other attachments on the items, and use the intended quantity.
- Insert and remove the longest or least flexible item. The zipper ends should not need to be pulled, twisted or forced out of the way.
- Close the loaded bag. Check whether the lining and pocket layers push into the zipper path or distort the outside panels.
- Wear every approved carrying mode at the shortest and longest required strap settings. Note the bag position and the location of the buckle, slider, rings and shoulder pad where one is used.
- Walk, turn and bend with the agreed sample load. For a sling, rotate the bag from back to chest and try the zipper pulls and any quick-access pockets with the intended hand.
- Record what was approved. Keep the measurement points, agreed tolerance, clear opening, strap range, hardware positions, pack-out photographs and sample comments together.
On the revised anonymous Belt Bag sample, the cased phone could be removed and returned with one hand in about three seconds during the reported check. The loaded bag also stayed close to the body during the agreed brisk-walk and slow-jog observations. The customer then gave written pre-production approval for that revised sample.
Those results confirm that one project met its agreed review conditions. They do not create a universal three-second access target, movement test or load rating for other bags.
Record the Fit That Produced the Approved Sample
Keep the item list, body and opening measurements, strap range, anchor construction, compartment layout and worn-sample notes in the final specification. Together, they show why the approved bag worked and give the production team a clearer reference than a small, medium or liter label. If you are developing a custom crossbody, sling or belt bag, send the reference style, intended contents, wearing modes, target-user range and approximate order plan. Annabelle Bag can use that information to review the proposed size and sample direction before the production specification is confirmed.
Frequently Asked Questions
What size crossbody bag will fit a phone, wallet and everyday essentials?
Start with the items, because two bags sold as the same size can hold very different loads. A compact bag of about 1.5 L may be enough for a cased phone, slim wallet, keys and earbuds when the opening and internal depth suit those items. Add a bottle, folded umbrella or hard glasses case, and a larger sling may be the better shape.
Pack everything together before confirming the size. The phone must pass through the finished opening without catching, and the thicker items should not press into the zipper. Outside dimensions and liter capacity are useful references, but neither one shows how much room the lining, seams and pockets take up.
How are crossbody bag dimensions measured?
Record width, height and depth from agreed points on the sewn bag. Width is normally taken across the body, height from the upper edge to the base, and depth across the gusset or base. Soft panels can change shape, so the specification should also state how the bag is positioned during measurement. The opening needs its own figure: clear opening is the straight space available after the zipper stops, lining, piping and side seams are in place. Zipper-path length follows the teeth, including any curve into the gussets. A long curved path can still leave a shorter straight aperture, so the two measurements belong on separate lines in the sample record.
What is the difference between strap length and strap drop?
Strap length follows the strap between stated endpoints. On an adjustable crossbody, the useful figures are usually the finished minimum and maximum settings, measured by the same method on every sample. The cut length of the webbing is different because folds, adjusters, buckles and sewn connections consume part of it.
Strap drop is a vertical measurement from the highest point of the hanging strap to the agreed point at the top of the bag. It helps describe where a bag may sit, but it does not predict fit on every wearer. Bag height, attachment spacing, clothing and body shape all change the worn position. For a multiway design, record the usable strap range and check the sample in each intended mode.
Is a wider crossbody strap always more comfortable?
Not on its own. A wider strap can spread the load over more of the shoulder, but a stiff edge may rub, a buckle may land on the collarbone, or an anchor angle may pull the bag away from the body. Load, webbing flexibility and hardware position often matter just as much.
The bag also has to suit the strap. A compact crossbody may work with 2.5 cm webbing, while a larger sling carrying a bottle or umbrella may call for 3.8 cm webbing and a movable shoulder pad. The two widths belong to those reference products; another design may need a different choice. Review the proposed strap on a loaded sample and at both ends of its adjustment range.
What is the difference between a sling bag and a crossbody bag?
Retail names overlap, but crossbody is the broader term in common use. It can describe any bag worn diagonally on one strap, including compact hip bags, structured everyday bags and some belt bags. A sling is usually closer to the body, sits higher on the chest or back, and can be rotated forward for access. The product name is therefore not enough for development. State where the bag should sit, which direction it faces, what it carries and whether the wearer needs to move it from back to chest. Those details determine the strap anchors, opening and pocket layout.
Can a belt bag also be worn as a crossbody bag?
Yes, if both wearing modes are considered in the pattern and strap system.
Extra strap length alone does not make the conversion work. The buckle and slider must stay away from the collarbone in crossbody mode and from the hip bone at the waist. The attachment points or side wings also need to hold the loaded bag against the body instead of letting the top edge tip forward.
Test the sample at the shortest and longest required settings, first at the waist and then across the torso. Pack the intended phone, keys and other hard items during the check. If the bag shifts, the opening becomes awkward to reach or the hardware settles on a pressure point, the two-mode fit still needs adjustment.