
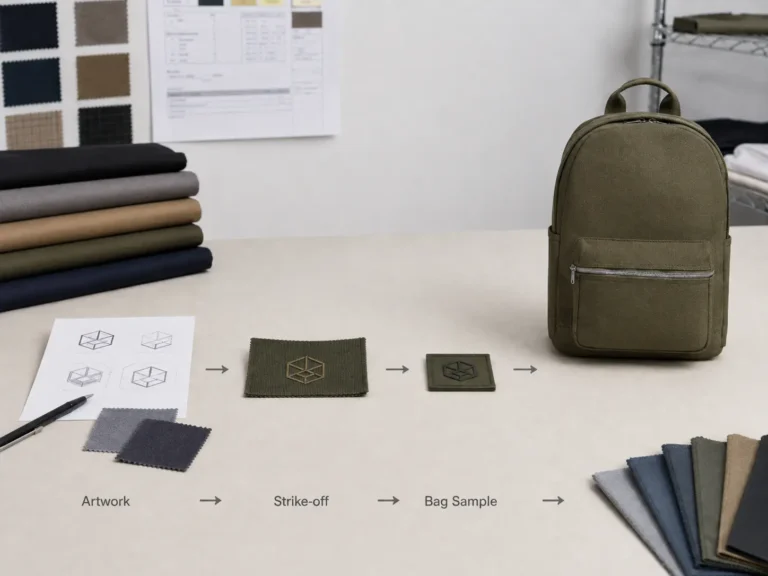
Custom backpack logo methods should be chosen based on the artwork, fabric surface, logo position and order quantity. Screen printing may work well for a simple graphic, while fine text, coated fabrics or padded panels can require a different approach. This guide compares the main backpack logo methods and uses real factory cases to show how to choose a process that can be tested and approved before bulk production.
Compare Custom Backpack Logo Methods
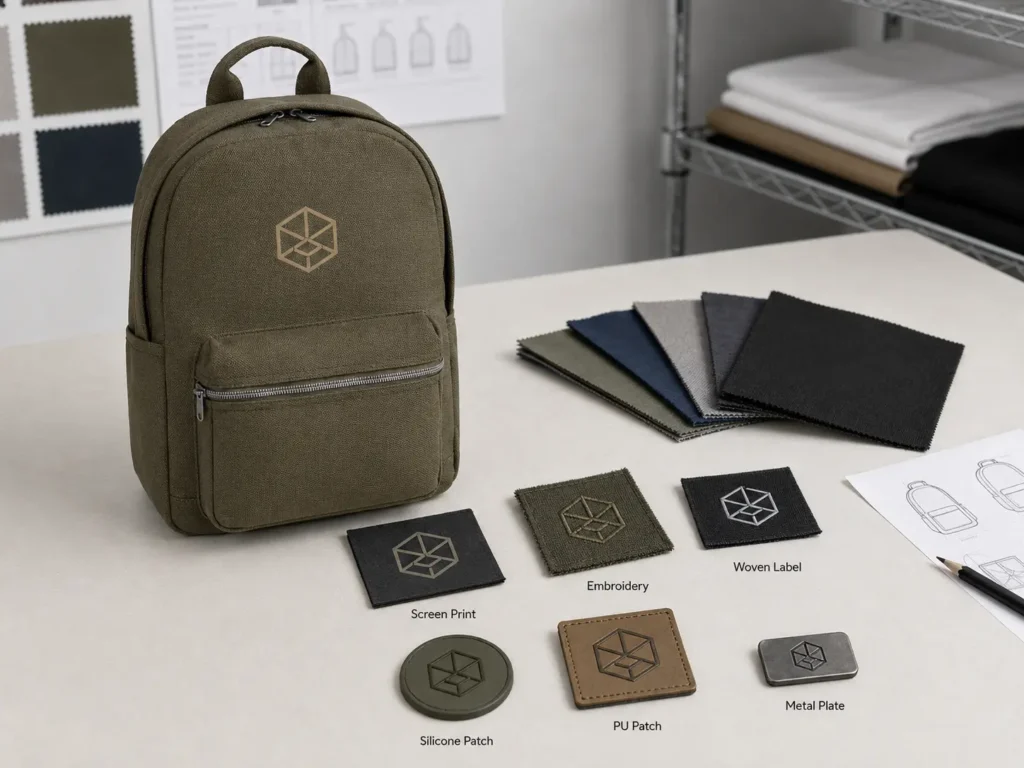
Different logo methods solve different problems. The table below is a starting point rather than a fixed rule, because the same process can perform differently when the fabric texture, coating, logo size or panel construction changes.
| Logo Method | Good Starting Point | Main Issue to Check |
|---|---|---|
| Screen printing | Simple one- to three-color artwork | Fabric texture and ink adhesion |
| Heat transfer | Detailed, multicolor or gradient artwork | Heat response and surface damage |
| Embroidery | Clear lettering and stitched branding | Fine detail, puckering and stitch density |
| Woven label | Small text and fine graphics | Size, sewing allowance and visual impact |
| Silicone / PVC patch | Raised or technical branding | Tooling, thickness and attachment |
| PU / leather patch | Embossed or lifestyle branding | Material consistency and sewing position |
| Metal plate | Hardware-style branding | Tooling and installation |
| Sublimation | Large-area graphics on suitable polyester | Fabric color and material compatibility |
For a simple logo on a relatively smooth panel, screen printing is often one of the first methods worth testing. If the artwork contains gradients or several colors, heat transfer may reproduce the graphic more easily, but the actual material still needs to tolerate the heat and pressure involved.
Embroidery is useful when the buyer wants a stitched texture, but very small lettering or dense fill can become difficult on some fabrics. For fine text, a high-density woven label may preserve the artwork more clearly.
A separate silicone, PVC or PU patch can be useful when direct printing, heat or dense stitching creates unnecessary risk on the backpack panel. Metal plates and other custom hardware offer a different visual direction, but tooling and installation should be considered together with the order quantity.
The table should therefore be used to narrow the options, not to make the final decision. The next step is to check the artwork, fabric surface, logo position and order quantity together.
Four Things That Actually Decide the Logo Method
Choosing between custom backpack logo methods requires more than checking how the same process looked on another bag. The result depends on how the artwork, fabric and backpack construction work together.
1. Artwork and Desired Visual Effect
Start with what the logo needs to reproduce.
Small text, thin lines, gradients and large filled areas create very different production requirements. The desired appearance matters too: the buyer may want a flat matte print, visible thread texture, a raised rubber effect, an embossed patch or a metal hardware look.
A simple solid-color symbol gives the factory several possible methods. A very small slogan can remove some of those options immediately.
The useful question is:
Can this process reproduce the important parts of the artwork in the appearance the buyer wants?
2. Actual Fabric Surface
“Polyester” or “nylon” alone is not enough information.
The factory also needs to consider:
- denier and weave
- surface texture
- DWR treatment
- PU or TPU coating
- lamination
- backing
- heat sensitivity
A smooth polyester panel and a coarse 1680D polyester panel may use the same fiber but behave very differently during printing.
The same applies to coated nylon. A graphic may be suitable for heat transfer, while the actual laminated panel reacts badly to heat and pressure.
For the broader material decision, see our custom backpack material selection guide.
3. Logo Position
A flat front panel is easier to decorate than many curved, padded or already assembled parts.
Before confirming the position, check how close the logo is to:
- seams
- zipper lines
- pocket edges
- folds
- reinforcement areas
Placement also affects machine access. Screen printing, heat transfer and embroidery are commonly completed while the relevant panel is still flat rather than after the backpack has been fully assembled.
4. Order Quantity
A technically possible logo method may not make commercial sense for every order.
Embroidery is strongly affected by stitch count and machine time. Screen printing changes with the number of colors and screens. Molded patches, metal plates and custom zipper pulls introduce tooling costs.
At lower quantities, those fixed costs have to be distributed across fewer bags.
That does not automatically rule out custom hardware. It simply means the buyer should understand the cost structure before approving it.
Three Logo Decisions That Changed After Factory Testing
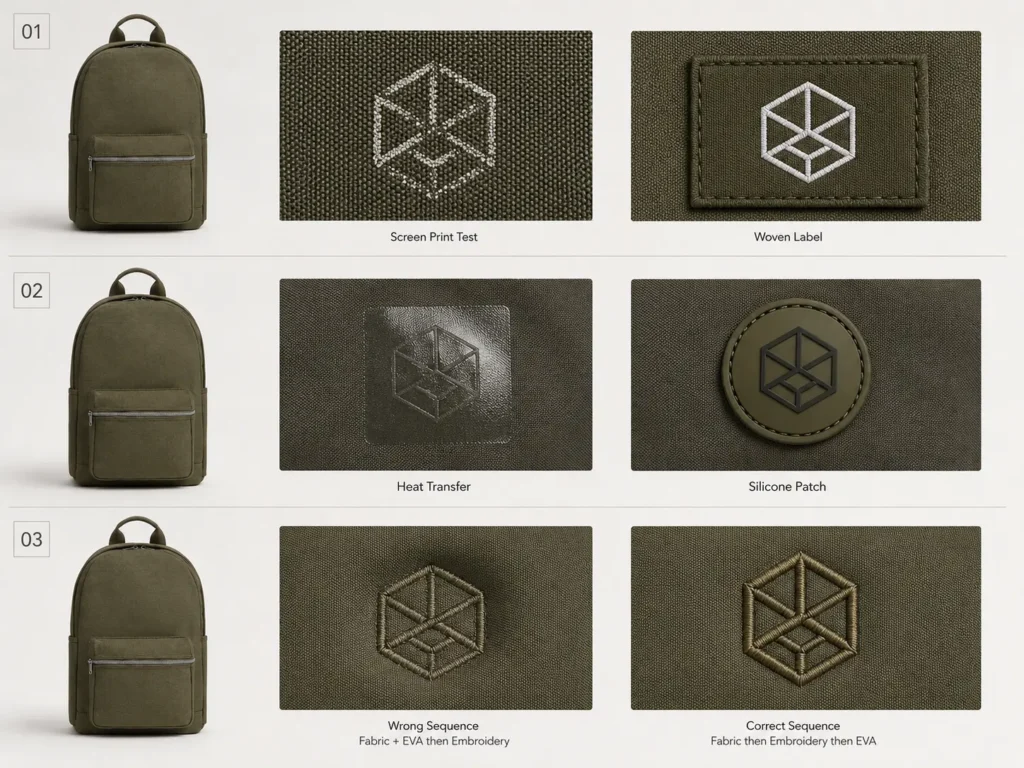
The three cases below show why custom backpack logo methods can change after the actual material and construction are tested.
Case 1 — Fine Text on Coarse 1680D Polyester
One commuter laptop backpack used coarse 1680D polyester with a heavy PU backing.
The buyer’s logo contained a minimalist line graphic with a very fine 8 pt slogan underneath it. The original plan was matte white screen printing.
Once tested on the actual material, the small text did not reproduce cleanly. Ink settled unevenly into the coarse weave, leaving broken strokes and rough edges. The treated surface also reduced adhesion, and the print began to lift under a basic scratch check.
Embroidery was considered, but the slogan was still too fine for the required appearance.
The project was changed to a high-density woven label with approximately 2 mm of sewing allowance around the edge.
A woven-label strike-off was made first. The second physical version was approved, and the same specification was used for the subsequent 1,500-piece production run.
In this case, the logo artwork and the actual fabric surface ruled out the original process.
Case 2 — Heat Transfer on TPU-Backed Nylon
An outdoor travel backpack used 420D nylon with a C0 DWR finish and a matte TPU waterproof film laminated to the back.
The artwork was a three-color mountain graphic with a gradient, so heat transfer appeared suitable from a graphic point of view.
During this project, the transfer test used approximately 150–160°C for 12–15 seconds.
The graphic transferred, but the panel did not respond well. The TPU layer softened and contracted locally. After cooling, the outer fabric showed visible press marks and increased gloss, while the panel edges became wrinkled and stiffer.
Instead of continuing to adjust the same transfer process, the logo was changed to a sewn silicone patch.
The gradient was simplified into three spot-color layers, and the patch was produced with a recessed sewing channel around the edge.
The revised version was approved.
This was not simply a “nylon problem.” The issue came from the combination of nylon, surface treatment, TPU lamination and the tested heat process.
Case 3 — Embroidery on a Foam-Backed Front Panel
A business backpack used a 900D polyester front panel with 4 mm EVA foam and a 210D lining.
The buyer wanted a dense embroidered logo approximately 10 cm wide in the center of the front compartment.
The embroidery method itself was workable. The problem was the production sequence.
If the EVA had already been laminated behind the outer fabric, dense embroidery would have compressed the foam and created an uneven depression around the logo.
Waiting until the front compartment was fully assembled was not practical either because the embroidery machine would no longer have suitable access.
The sequence was changed to:
Outer fabric panel
→ Embroidery
→ EVA lamination
→ Final panel preparation
→ Sewing
The logo was also moved upward. In this particular project, its lower edge was kept approximately 35 mm away from the lower zipper and structural sewing area.
That distance was specific to this backpack. The important point was to confirm the logo position and embroidery stage before the front panel was assembled.
Approve the Logo Before You Approve the Backpack
Choosing the method is only the first decision.
The logo should normally be checked once as an individual decoration and again after it becomes part of the finished backpack.
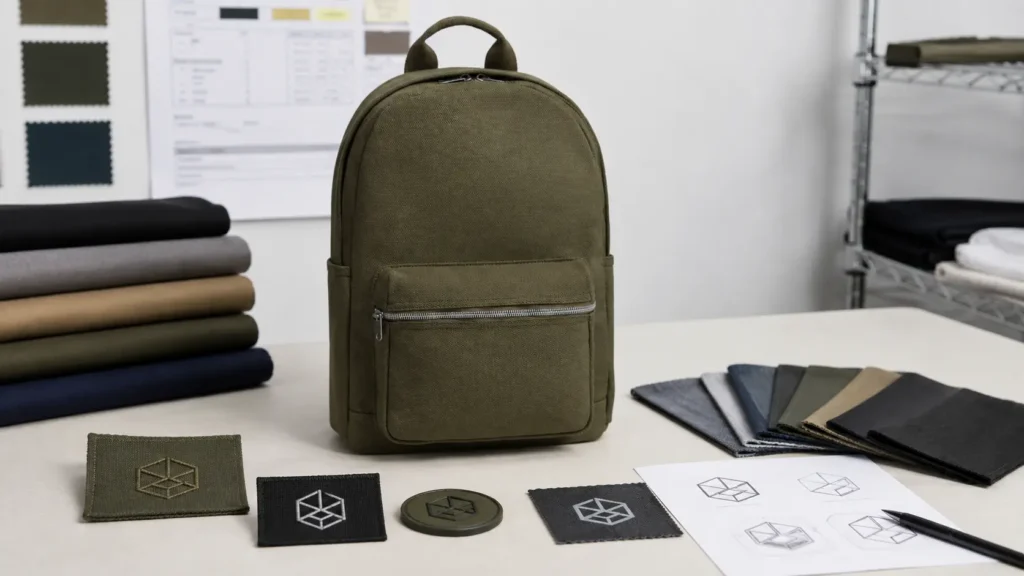
Start With Production-Ready Artwork
For precise logo development, Annabelle Bag normally works from vector artwork such as:
- AI
- EPS
- editable PDF
Text should be converted to outlines. Required colors should also be identified using an agreed reference such as Pantone Solid Coated or TCX where appropriate.
A JPG can still be used for an initial feasibility review.
It can help the factory understand the logo shape, approximate size and likely process, but it should not normally be used directly for precise mold engraving or production tooling.
If necessary, the graphic can first be redrawn as vector artwork and returned to the buyer for approval.
Confirm a Strike-Off or Swatch
Before making the complete backpack sample, a smaller logo test can reveal problems earlier.
Depending on the process, this may be:
- an embroidery swatch
- a screen-print test
- a heat-transfer test
- a woven-label sample
- a silicone or PVC patch sample
At this stage, check:
- small-text clarity
- color
- edge definition
- adhesion
- fabric distortion
- patch thickness
This is usually a more efficient stage to correct the logo than after the full backpack sample has already been made.
Check the Logo Again on the Finished Backpack
A good strike-off does not guarantee perfect placement after sewing.
Once the backpack is assembled, check:
- final logo size
- color
- edge quality
- stitch density
- adhesion
- puckering
- alignment
- distance from seams and zippers
- appearance when the bag is filled
A logo can be mathematically centered on a flat cut panel but still look off-center on the finished backpack.
Seam consumption, fabric tension, pocket shape and panel curvature can all affect the final visual position.
| Problem | What to Recheck |
|---|---|
| Fine letters disappear | Artwork size and logo method |
| Print edges look rough | Fabric texture and printing process |
| Print peels | Surface treatment and ink compatibility |
| Embroidery puckers | Density, tension, backing and fabric stability |
| Panel becomes glossy | Heat, pressure and coating response |
| Patch looks too bulky | Thickness, size and placement |
| Logo tilts after sewing | Panel position and assembly |
| White logo changes color | Dye migration and underbase system |
For a real example of finished backpack inspection, see our custom backpack quality inspection case study.
What the Factory Needs to Recommend the Right Logo Method
The buyer does not need to choose the final process alone.
To get a useful recommendation, prepare:
- vector logo artwork if available
- desired logo size
- preferred position
- backpack reference or design
- actual or planned material
- target quantity
- desired visual effect
- color reference where required
The factory can then compare suitable custom backpack logo methods against the artwork, material, panel construction and order requirements before deciding which process should be sampled first.
If the backpack structure itself is still being developed, review our custom backpacks before fixing the final branding position.
Annabelle Bag supports screen printing, heat transfer, embroidery, woven and printed labels, silicone and PVC patches, leather and PU patches, metal plates, custom zipper pulls, inner labels, hangtags and sublimation for suitable backpack projects.
The objective is not to select the most expensive or technically complicated branding method. It is to choose one that reproduces the artwork correctly, works with the actual backpack construction and can be verified before bulk production.
Buyer Questions Before Finalizing Backpack Branding
Once the logo method has been narrowed down, buyers usually still need to confirm how branding will work across the complete backpack, what may require tooling, and when changes can still be made without disrupting production.
Can one backpack use more than one branding method?
Not necessarily. Two fabrics may both be polyester or nylon but have different textures, coatings, laminations or heat resistance. A process that works well on one panel should not automatically be assumed to work the same way on another.
Do I need vector artwork before making a backpack logo sample?
Vector artwork such as AI, EPS or editable PDF is preferred for precise sampling and tooling. A JPG can be used for an initial feasibility review, but detailed production artwork may need to be redrawn and approved before molds, screens or other tooling are prepared.
Should the logo sample be approved before the full backpack sample?
For a new branding method, a strike-off or swatch can confirm color, detail, adhesion and material response before the complete bag is made. The logo should then be checked again on the assembled backpack because sewing and panel curvature can change its final position and appearance.
Should the logo sample be approved before the full backpack sample?
For a new branding method, a strike-off or swatch can confirm color, detail, adhesion and material response before the complete bag is made. The logo should then be checked again on the assembled backpack because sewing and panel curvature can change its final position and appearance.