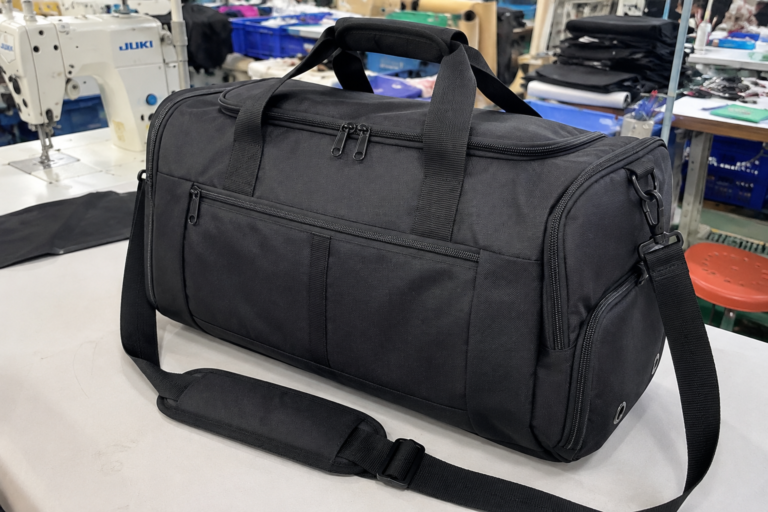
A buyer sent us front and side 3D renderings for a multifunctional travel and gym duffel bag. The proportions, contrasting colors and logo placement had already been worked out, and the design looked close to being ready for sample development.
The first physical sample also looked right while it was standing on the table with filling paper inside.
The problems appeared after we removed the paper and packed the bag with the items it was expected to carry: one pair of EU size 43 athletic shoes, three sweatshirts and two pairs of pants.
The shoe-compartment lining occupied too much of the practical main-compartment space. The straight top zipper restricted access to both ends of the bag, and the unsupported base sagged toward the heavier shoe side when the bag was lifted.
The buyer wanted to keep the original 50 × 26 × 26 cm dimensions, the separate shoe compartment and the agreed budget direction.
Instead of simply making the bag larger or replacing every material with a more expensive option, we revised the parts that directly affected packing and carrying.
The second sample was tested with the same shoes and clothing. The revised construction met the review requirements and was approved by the buyer.
Project Scope
The Rendering Defined the Appearance, but Not the Loaded Bag
The buyer had already provided enough information to establish the exterior direction of the duffel bag.
We received front and side 3D renderings, vector logo artwork, an approximate outer size of 50 × 26 × 26 cm and a request to use 600D polyester.
A separate side shoe compartment was one of the main features the buyer wanted to keep.
Several construction details were still open when the first sample was prepared.
The maximum shoe size had not been confirmed. The rendering did not show how far the shoe-compartment lining would extend into the main body, and there was no final requirement for internal dividers or a wet-and-dry pocket.
The visible zipper line showed the general position of the top opening, but not how wide the opening needed to be in actual use.
We also needed to confirm whether the handle webbing should continue underneath the base and what backing should be used on the 600D polyester.
For the final sample, 600D polyester with PU backing was selected.
What We First Questioned
The Shoe Compartment Was the First Detail We Looked At
The exterior proportions and color combination did not immediately concern us.
The side shoe compartment did.
With an outer size of about 50 × 26 × 26 cm, the bag looked reasonable for gym use or short trips. But the rendering did not show what would happen to the internal space after a pair of shoes was pushed through the side opening.
The shoe compartment was not additional external space. Its inner lining had to extend into the main compartment.
The question was how much practical packing space would remain after the shoes were inside.
That was difficult to judge from the rendering alone.
How We Tested the First Sample
We Removed the Filling Paper and Packed the Bag for Actual Use
When the first sample came back from the sewing room, its shape appeared close to the rendering.
The body looked quite structured because the sample was filled with paper.
We removed the filling material before evaluating the bag.
We then placed one pair of EU size 43 athletic shoes into the side shoe compartment.
After that, we packed three sweatshirts and two pairs of pants into the main compartment.
Finally, we closed the top zipper and lifted the loaded bag by its handles.
This was not a laboratory load-rating test. It was a practical sample-room review using the items the bag was expected to carry.
Problem 1: The Shoe Compartment Used Too Much Practical Packing Space
The shoes physically fitted into the compartment.
That was not the problem.
Once the EU size 43 shoes were inside, the original shoe-compartment lining pushed deeply into the main compartment.
The outer dimensions of the bag had not changed, but the remaining storage space was no longer easy to use.
We tried to place three folded sweatshirts and two pairs of pants inside.
The clothing would still fit, but it could not be laid flat in the way we expected. Some pieces had to be rolled or pressed around the shoe compartment.
This showed an important difference between theoretical capacity and usable packing space.
A bag may technically hold all the required items while still being inconvenient to pack.
Problem 2: The Straight Top Opening Restricted Access
Before the packing test, we expected the shoe compartment to be the main issue.
After the bag was full, the top opening became an even more noticeable problem.
The first sample used a straight zipper across the top.
The actual main compartment extended farther toward both ends than the visible zipper opening.
Items in the middle were easy enough to reach, but the two ends became blind areas.
To reach clothing near the bottom or ends of the bag, we had to push a hand through the narrow opening without being able to see clearly inside.
The back of the hand could also rub against the zipper teeth while reaching toward the lower corners.
There was another problem after the bag was fully packed.
As the body expanded, the two ends of the straight zipper were pulled outward. Closing the bag with one hand became difficult.
The problem was therefore not only how much the bag could hold.
The opening also affected how effectively that space could be used.
Problem 3: The Base Did Not Have Enough Support
The shoes created more weight at one end of the bag.
On the first sample, the handle webbing was attached to the side panels but did not continue underneath the base.
There was also no PE board supporting the bottom.
When the loaded bag was lifted, the shoe side moved downward first.
The bottom sagged and the center of the bag lost its shape.
Simply changing to a heavier outer fabric would not necessarily solve this problem.
The carrying force needed to be distributed more effectively from the handles, down the side panels and across the bottom.
Why We Did Not Simply Make the Bag Larger
One possible solution would have been to increase the outside dimensions.
We decided against that direction.
The buyer wanted to keep the approximate 50 × 26 × 26 cm size.
The separate shoe compartment was also an important part of the product concept, so removing it was not a suitable solution either.
Making the bag larger would also increase material use and empty-bag weight and could make the overall appearance bulkier.
Most importantly, increasing the size would not solve the restricted access created by the straight top opening.
We therefore kept the required exterior dimensions and focused on improving how the existing space worked.
How We Revised the Second Sample
The Structure Changed, but the Required Size Stayed the Same
The second sample kept the approximate 50 × 26 × 26 cm outer dimensions.
The main revisions focused on four areas:
- The shoe-compartment lining
- The top opening
- The handle and webbing structure
- The base support
The material direction also remained 600D polyester, with PU backing confirmed for the revised sample.
Shoe Compartment Revision
A Collapsible Inner Compartment Replaced the More Fixed Structure
The buyer still needed a separate shoe compartment.
Instead of removing it, we changed the way the inner lining behaved.
The revised compartment used a softer collapsible lining that could fold back toward the side wall.
When the shoe compartment was empty, the inner material no longer needed to hold a fixed volume inside the main compartment.
This released more usable packing space.
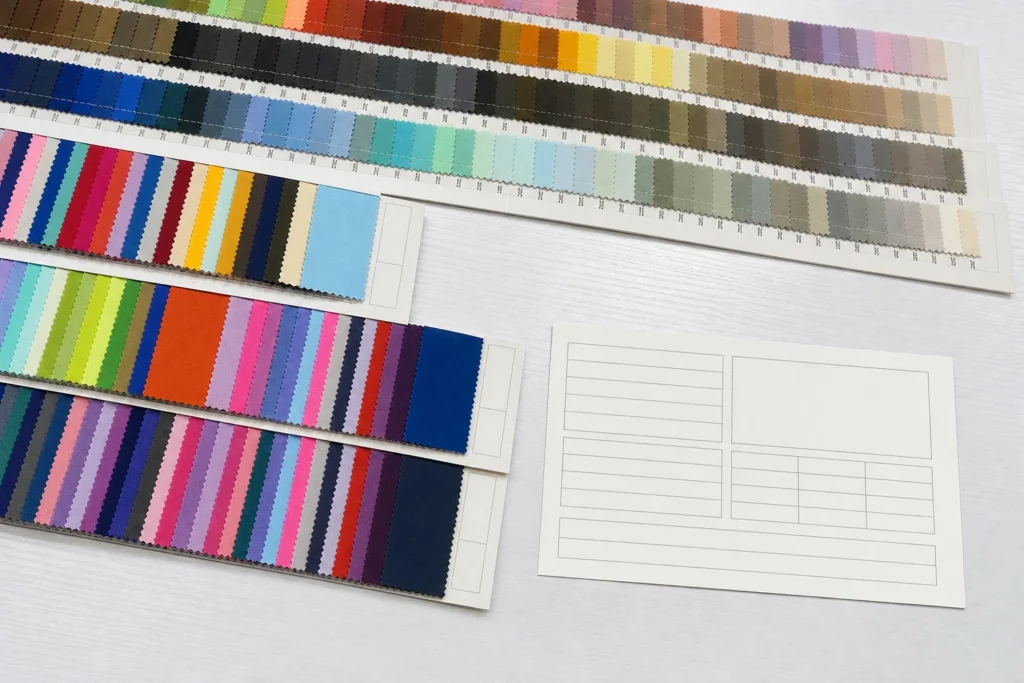
The lining material itself was selected according to the actual function and the buyer’s budget.
The inner shoe compartment did not require the most expensive available fabric.
What mattered was that the material could separate the shoes from the clothing, remain flexible enough to fold toward the side wall and work reliably with the revised construction.
A more economical soft lining material was therefore selected for this part.
The budget was not treated as a reason to reduce every specification.
Instead, we spent more attention on the structural areas that had a direct effect on use.
Top Opening Revision
The Straight Zipper Was Replaced with a Large U-Shaped Opening
The second sample used a large U-shaped top opening with two zipper pullers.
This changed how much of the main compartment could be seen when the bag was opened.
Instead of accessing the contents through one narrow straight opening, three sides of the upper section could now open.
The two ends and the bottom of the main compartment became much easier to see.
Folded clothes could also be placed into the bag more naturally without having to push them through a narrow central opening.
The outside dimensions did not need to increase to achieve this improvement.
Handle and Base Revision
The Webbing Was Extended Underneath the Bag
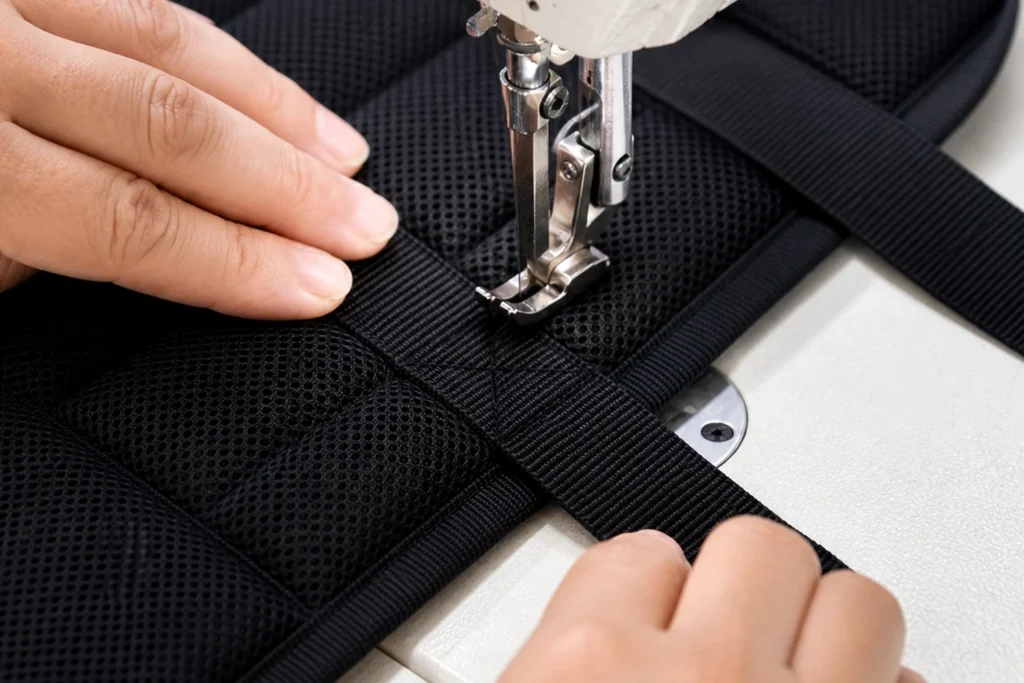
For the second sample, the carry-handle webbing was extended farther down the side panels and underneath the base.
Box-X reinforcement was added around the main handle attachment areas.
A PE board was also added inside the bottom construction.
These changes worked together.
The through-bottom webbing helped distribute the carrying force across more of the bag.
The Box-X reinforcement supported the handle attachment areas.
The PE board spread the internal load across the base and helped the bottom maintain a flatter shape.
The aim was not to make the duffel completely rigid.
The goal was to reduce the obvious one-sided sagging seen on the first sample when the shoes were inside.
Material Selection
Why We Kept 600D Polyester with PU Backing
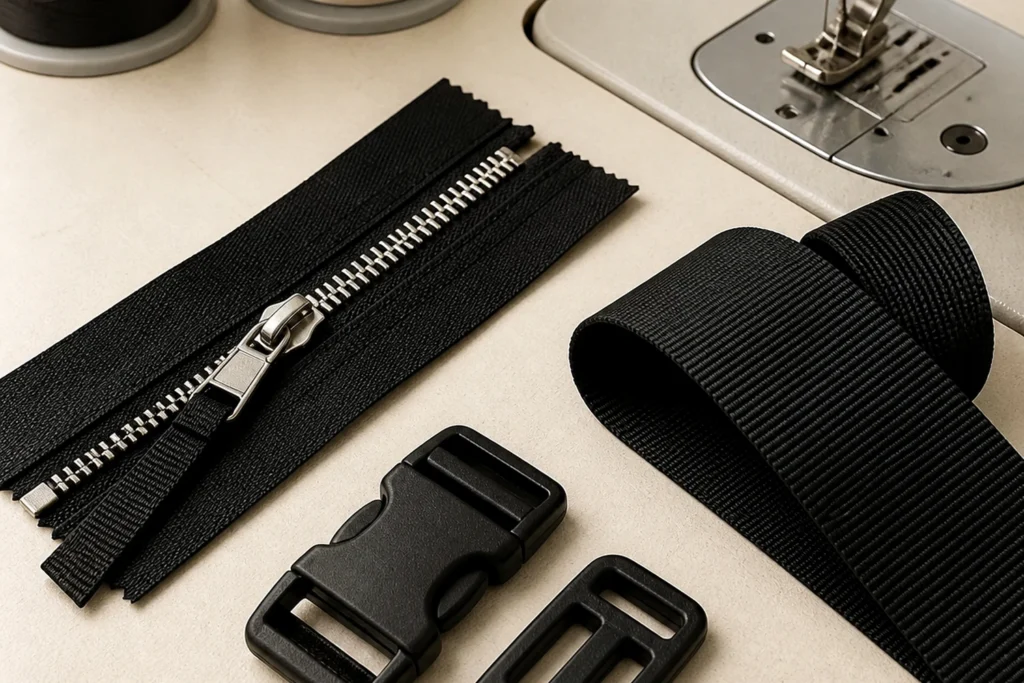
The buyer originally requested 600D polyester.
We kept that material direction for the revised sample and confirmed PU backing.
“600D polyester” alone does not fully describe how a finished bag will feel.
Different backing treatments can change the weight, flexibility and firmness of the material.
For this project, PU backing provided a suitable balance for the required feel, construction and budget.
The final structure was not determined by fabric alone.
The lining, PE board, handle webbing, reinforcement and pattern construction all contributed to the finished result.
Water Resistance Was Treated Separately
A coated polyester material can provide some resistance to splashes and moisture.
That does not automatically make the complete duffel bag waterproof.
Ordinary sewn construction creates needle holes, and water may also enter through zipper and seam areas.
Unless a project defines the required performance, construction and test method, we prefer not to describe an ordinary sewn duffel bag as fully waterproof.
For this project, the material and construction were selected according to the buyer’s actual use rather than adding unnecessary waterproof construction that had not been requested.
How We Retested the Second Sample
The revised sample was tested again using the same packing load as the first sample.
We used:
- One pair of EU size 43 athletic shoes
- Three sweatshirts
- Two pairs of pants
Using the same items made it easier to compare the two versions.
Result 1: The Shoe Compartment Was Easier to Use
The EU size 43 shoes were easier to insert and remove from the revised compartment.
When the compartment was not being used, the softer inner lining could fold toward the side wall.
This released more usable space in the main compartment compared with the first sample.
Result 2: The Clothing Could Be Packed Normally
We again placed three sweatshirts and two pairs of pants inside the bag.
This time, the clothing could be laid flat instead of being rolled and forced around the shoe compartment.
The outside dimensions remained approximately 50 × 26 × 26 cm.
The improvement came mainly from using the existing internal space more effectively.
Result 3: The Main Compartment Was Easier to See and Access
The U-shaped opening exposed much more of the main compartment.
Both ends and the bottom were visible when the bag was opened.
Clothing was easier to place inside and easier to retrieve.
The improvement came from changing the opening rather than simply increasing the bag volume.
Result 4: The Zipper Closed Smoothly After Packing
After the same test items were loaded into the revised bag, the double zipper closed normally.
It could be operated with one hand during the sample review.
We also checked the movement around the U-shaped corners.
No sticking was observed during the repeat test.
Result 5: The Loaded Bag Carried More Normally
We lifted the revised sample again with the shoes and clothing inside.
The obvious one-sided sagging seen on the first sample was no longer observed under the same packing condition.
The through-bottom webbing, reinforced handle attachment areas and PE base board gave the loaded bag better support.
No new problem was found during the repeat packing and carrying review.
Buyer Approval
The Second Sample Was Approved
The second sample retained the buyer’s required approximate 50 × 26 × 26 cm dimensions.
It also retained the separate shoe compartment and the agreed 600D polyester material direction with PU backing.
The repeat test confirmed that:
- EU size 43 athletic shoes were easier to insert and remove.
- The collapsible shoe-compartment lining could fold toward the side wall.
- Three sweatshirts and two pairs of pants could be laid flat.
- The U-shaped opening provided a clear view of both ends and the bottom.
- Packed items were easier to place and retrieve.
- The double zipper closed smoothly after loading.
- The zipper could be operated with one hand.
- No sticking was observed around the zipper corners.
- No obvious carrying problem appeared when the loaded bag was lifted.
- No new issue was found during the second sample review.
The buyer approved the revised sample.
These results apply to this specific sample, construction and packing condition.
They should not be treated as a universal load rating or performance claim for every duffel bag using a similar appearance.
The Main Lesson from This Sample Development
The Best Revision Was Not Simply the Most Expensive One
This project did not need the largest possible bag or the most expensive available materials.
The buyer needed a duffel bag that could:
- Keep the approximate 50 × 26 × 26 cm dimensions
- Retain the independent shoe compartment
- Use the agreed 600D polyester material direction
- Hold EU size 43 athletic shoes
- Provide practical room for the required clothing
- Give better access to both ends of the main compartment
- Carry the agreed test load more normally
- Stay within the buyer’s budget
That last point was an important part of the development process.
Custom bag development is not always about upgrading every material.
Different parts of the bag have different jobs.
For the collapsible shoe compartment, a more economical lining could meet the required function and help control the cost.
For the opening, handle-webbing route, reinforcement and base support, structural changes were more important because they directly affected how the finished bag was packed and carried.
The final sample represented a balance between function, appearance, construction and the buyer’s target budget.
What Buyers Should Confirm Before Making a Duffel Bag Sample
A detailed 3D rendering is useful, but it does not replace a complete product brief.
Before making a custom duffel bag sample, we normally recommend confirming the following points:
- Main use of the bag
- Typical items that will be carried
- Maximum shoe size if a shoe compartment is required
- Target outside dimensions
- Any carry-on size requirement
- Required and optional compartments
- Preferred opening style
- Whether the bag should feel soft or structured
- Handle and carrying requirements
- Outer material and backing direction
- Lining requirements
- Logo artwork and logo method
- Estimated first-order quantity
- Target budget
Providing a budget does not simply mean asking the manufacturer to use cheaper materials.
It allows both sides to decide where the cost matters most.
Some parts of the bag directly affect function and should receive more structural attention.
Other areas may allow a more economical material without changing the required user experience.
A good sample should balance both.
From Rendering to a Bag That Works in Real Use
A 3D rendering can confirm how a bag is expected to look.
It cannot fully show what happens after real shoes, clothing and other items are packed inside.
That is why we prefer to review a sample under conditions close to its intended use.
In this project, the first sample showed that the biggest improvements did not require a larger outside body.
The shoe-compartment structure, opening, handle-webbing route and base support mattered more.
After those areas were revised, the second sample was packed again with the same items and approved by the buyer.
Custom Duffel Bag Sample Development at Annabelle Bag
Annabelle Bag works on OEM and private label bag projects from 3D renderings, technical drawings, reference images, existing samples and original product concepts.
Before sampling, we can review:
- Intended use
- Expected contents
- Target dimensions
- Pocket and compartment requirements
- Material and lining direction
- Opening and zipper construction
- Handle and webbing construction
- Base reinforcement
- Logo method
- Estimated quantity
- Packing requirements
- Target budget
When a first sample exposes a problem, the next revision should focus on the areas that actually affect the finished product.
Sometimes that means changing the material.
Sometimes the better solution is to change the pattern, opening, internal structure or reinforcement.
The right direction depends on the buyer’s product requirements, intended use and target cost.
Discuss Your Custom Duffel Bag Project
If you already have a 3D rendering, reference image, technical drawing or existing sample, you can send it to us for review.
It is helpful to include the intended use, expected contents, target dimensions, maximum shoe size, preferred material, logo artwork, estimated order quantity and budget direction.
We can use that information to identify the main points that should be confirmed before sample development and bulk production.